Redwood gates are an integral part of many fences. For whatever purpose the redwood fence serves, usually to keep people or animals out or in, redwood gates provide a means of passing through the fence to access the other side.
Details Landscape Art has been installing high end beautiful gardens in the North Bay since 1991, and we are often called upon to install fencing. The four previous blogs address the construction of different types of fences we construct, and now we will discuss gates to be installed in these fences.
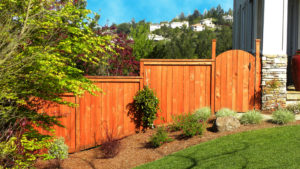
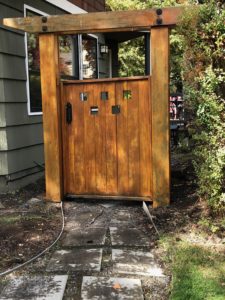
The height of the gate usually matches the height of the fence, but may be slightly taller for a different design element. For example, in a six-foot fence we may build a six and one-half foot gate with a curved top that extends above the fence. We may build a four-foot tall gate in a three-foot high horizontal fence just to do something different. And there are so many different styles of gates that can be built, some matching the fence style, some totally unique (see photos).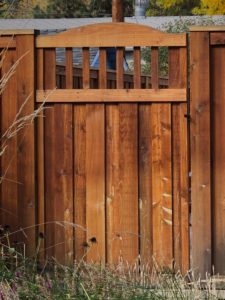
We always try to locate redwood gates in a part of the fence that is relatively level. The tops of the two posts on either side of the gate should be level for visual appeal.
So let’s say we are building a gate for a six-foot tall fence, which will extend a few inches above the fence. And let’s assume we will be using that same rough redwood and the same width fence boards also. We usually recommend that the gate be no wider than three and one-half feet (42”) wide to minimize gate sag.
First of all, when we build the fence and we know where the gate will be located, we set two posts about 42 5/8” apart (5/8” is the ‘reveal’ between the non-hinge side of the gate and the post so the gate has room to swing open). This spacing must be exactly the same at the top of the two posts as at the bottom.
We build the frame of the gate with two by fours – the top and bottom will be 42” wide and the sides will be about 60” apart. The top and bottom are screwed onto the end of the sides, careful to make a perfect rectangle. We then cut the ends of a 2×4 to use as a brace. It is easiest to place the 2×4 on top of the rectangular frame at about a 45-degree angle and scribe the lines before cutting. Screw the brace inside the frame. Now using 6-foot long 1×6 flat top fence boards, center the fence boards on one side of the frame, so that the fence boards protrude equally above and below the frame. Start with placing boards on the outside and add boards toward the center. There will be a gap in the center, and fence board will have to be ripped vertically to fit this gap. Nail the fence boards to the frame and the brace. We then like to round the top of the gate by cutting the top of the boards with a jigsaw.

Now that the gate is built, we hang the gate on one post or the other (depending which whether we want the gate to swing – left to right or right to left). The gate should always open internally. We use heavy-duty black gate hinges, and a heavy-duty black gate latch.
There are various accessories available, such as kickstands to hold the gate open, various black handles. For shorter redwood gates that are actually wider than tall, we occasionally encounter gate sag, and there are gate sag kits available that work well to alleviate this problem.